

How To Install Pickups On Stratocaster
How to supersede Stratocaster pickups
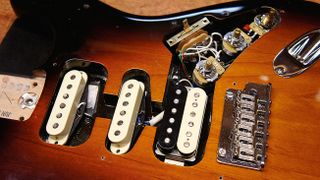
I of the best things about a Stratocaster is that it's a pickguard design - which ways that almost all of the serviceable parts are mounted straight onto an easily removable pickguard. This makes switch-ups like this a doddle.
Have a await at a Les Paul: to re-wire that you lot've got to run cables up through the centre of the guitar; put the pickups in the same fashion; practise what wiring you tin out of the guitar; and solder the rest - while not melting the sides of the electronics cavity. Nosotros'd rather be in the pit stop crew for team Strat!
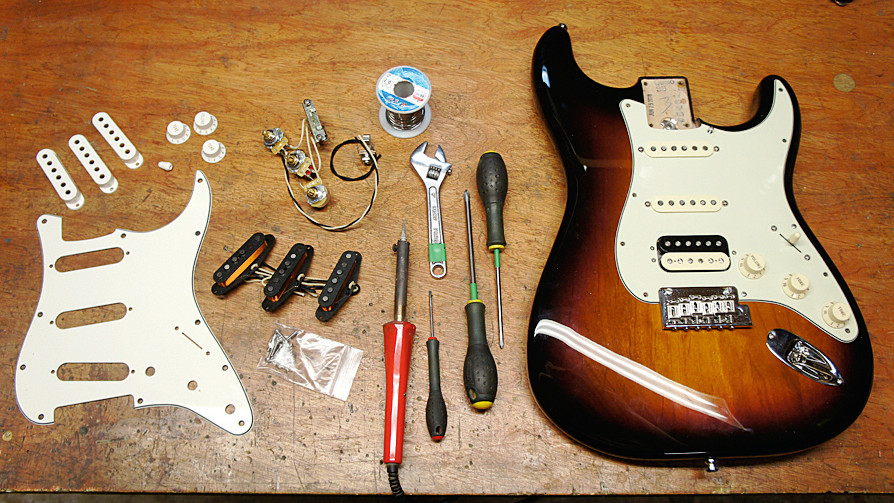
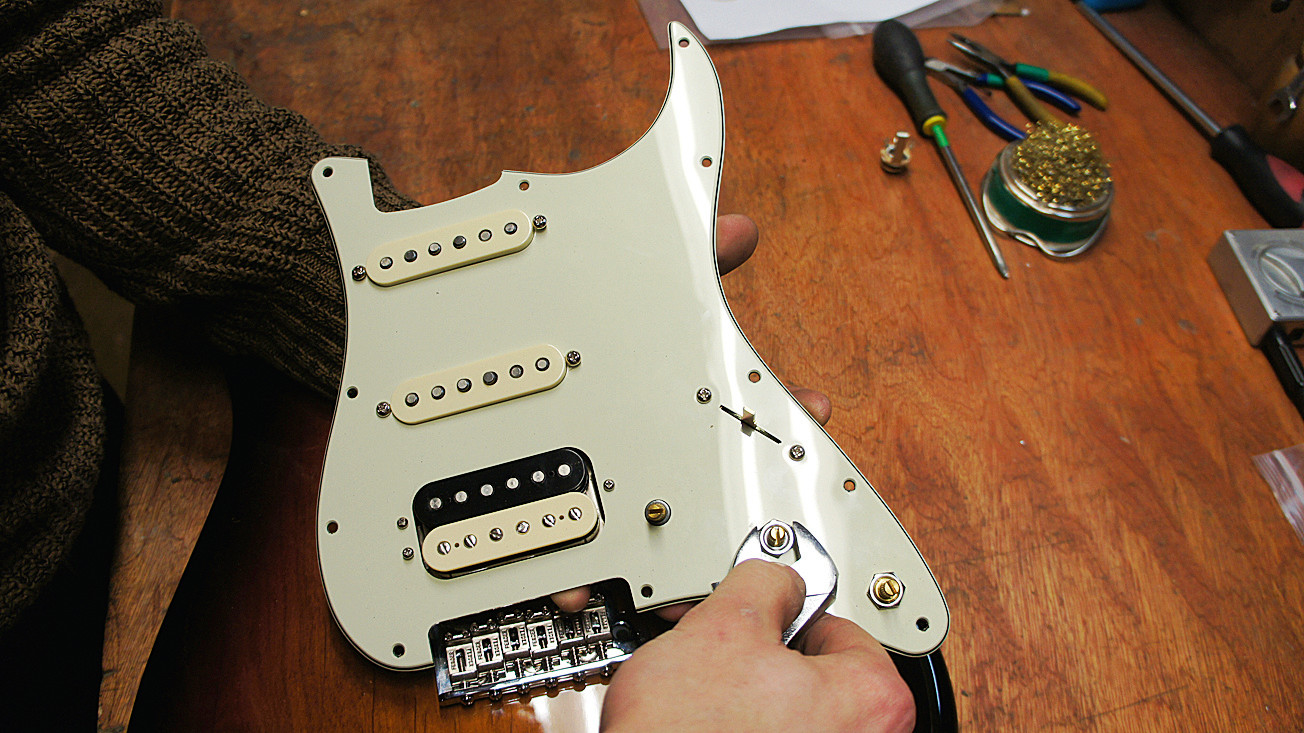
In that location are thousands of upgrade parts for Strats, and then choosing is in fact harder than fitting... and watch out for snake oil! The owner of this American Professional Strat has opted for some Klein Epic 1962 pickups as a matching set. He's also supplied us with a partially wired loom, including some dainty parts all mounted on a new Fender pickguard. Nosotros'll build the pickguard up, solder it and fit it to the guitar.
- Explore the best electric guitar pickups right now
What yous need
- Flash new pickups
- Pickup mounting screws & springs
- Pickup covers
- New pickguard
- New knobs
- New switch tip
- Wire cutters
- 60/40 solder
- Partially soldered wiring loom
- 40 watt soldering iron
- PH1 and PH2 screwdrivers
- Adjustable spanner
- Wiring diagram
Footstep ane
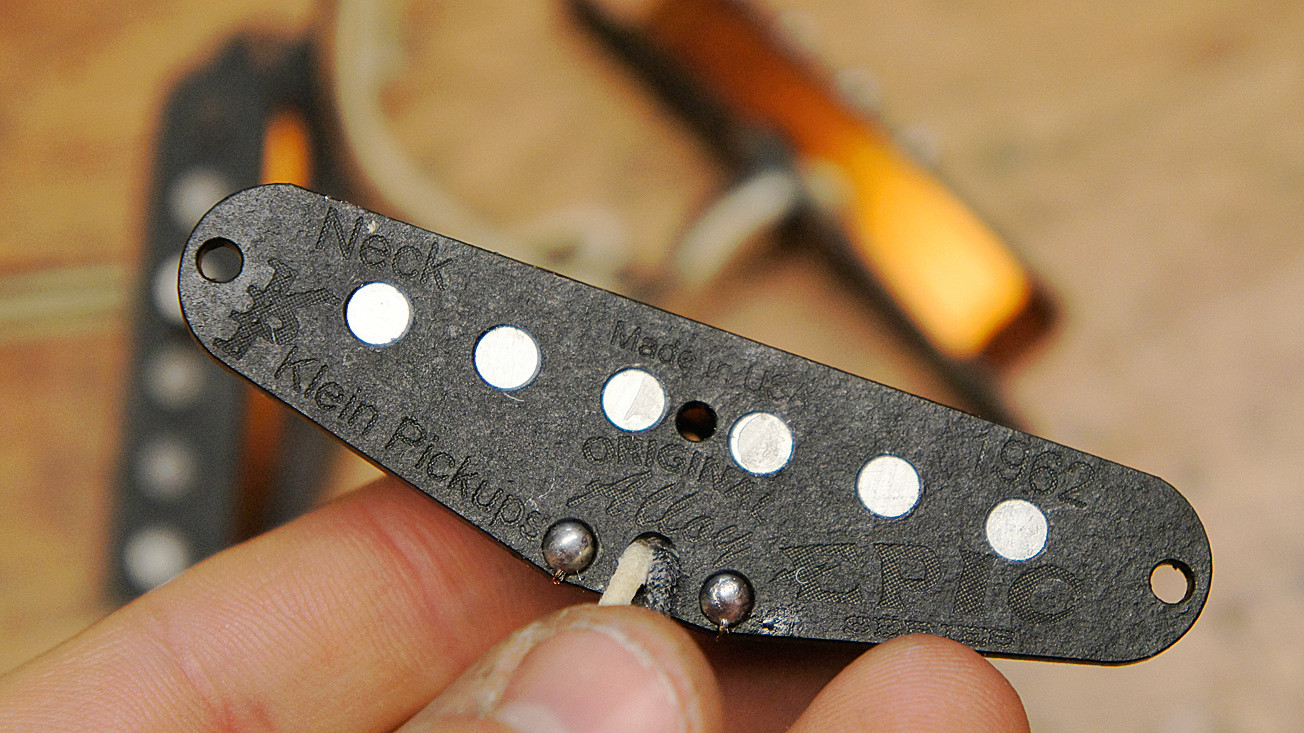
We have a prepare of near identical matched pickups - just which one'south which? This brand helpfully tells the states on the rear! If you have no inkling, you lot can connect the hookup wires to a multimeter and test the resistance - the 1 with the highest resistance is probable to be the span.
Step 2
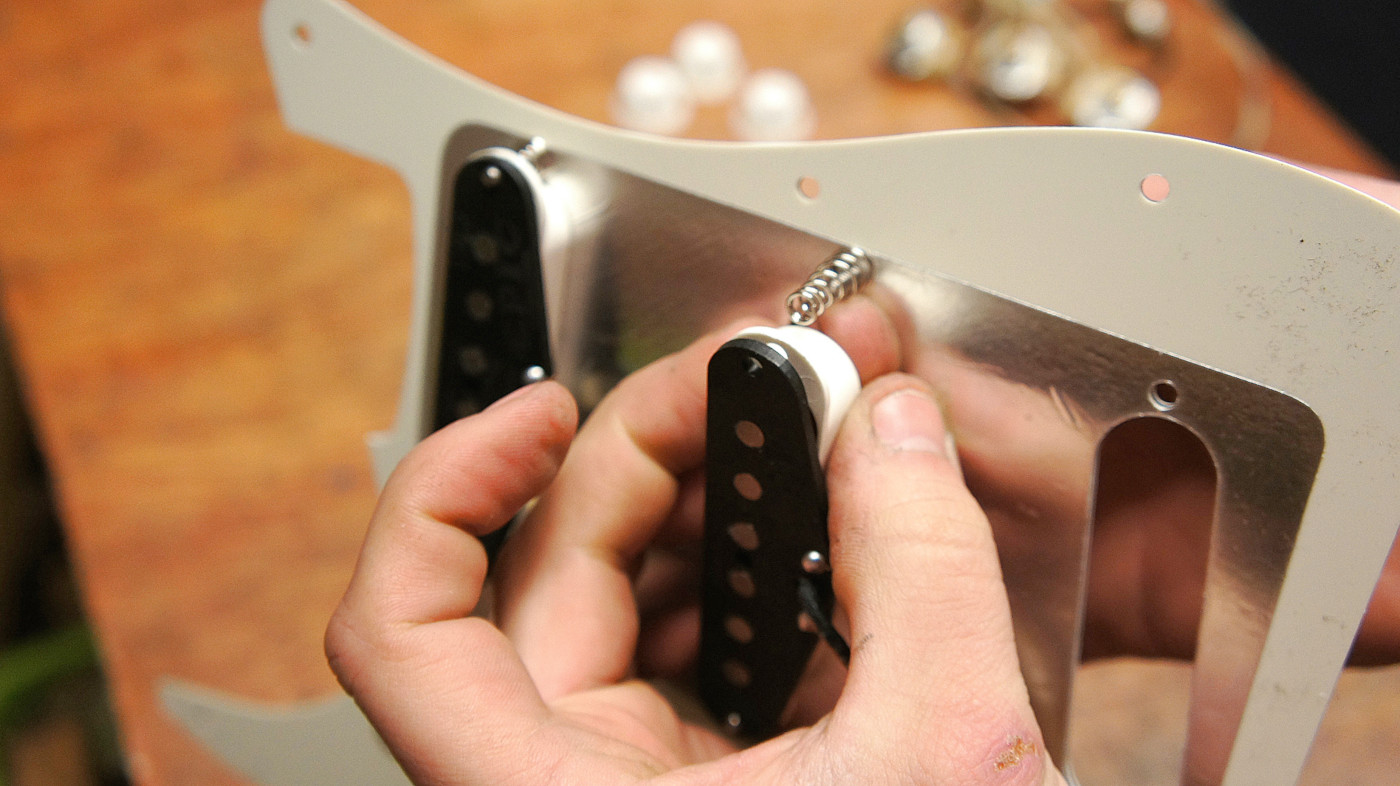
Advisedly put your new pickups inside their plastic covers. Those fine winds are incredibly delicate - we've seen them break with the help of a screw getting attracted to them many times. The pickup screws become through the guard, through the jump and into the forbon pickup baseplate. Yeah, information technology's fiddly - the leap can fly off.
Step 3
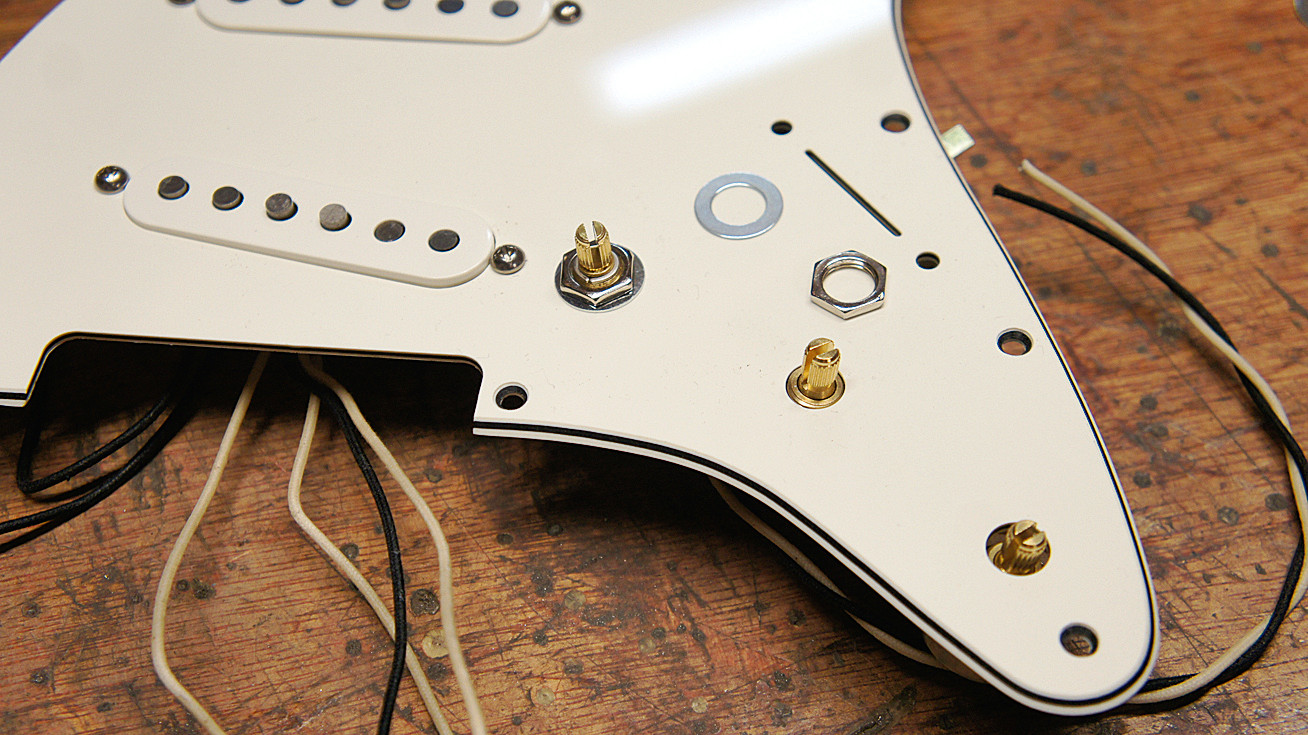
Don't worry about setting the pickups' concluding height yet; that's done when they're strung upward. Time to popular the pots through - the star washer goes on the back and helps the pot take hold of onto the rear of the pickguard. Be very careful not to impairment your pickguard though - line the edges of your spanner with masking record just to be sure.
Step 4
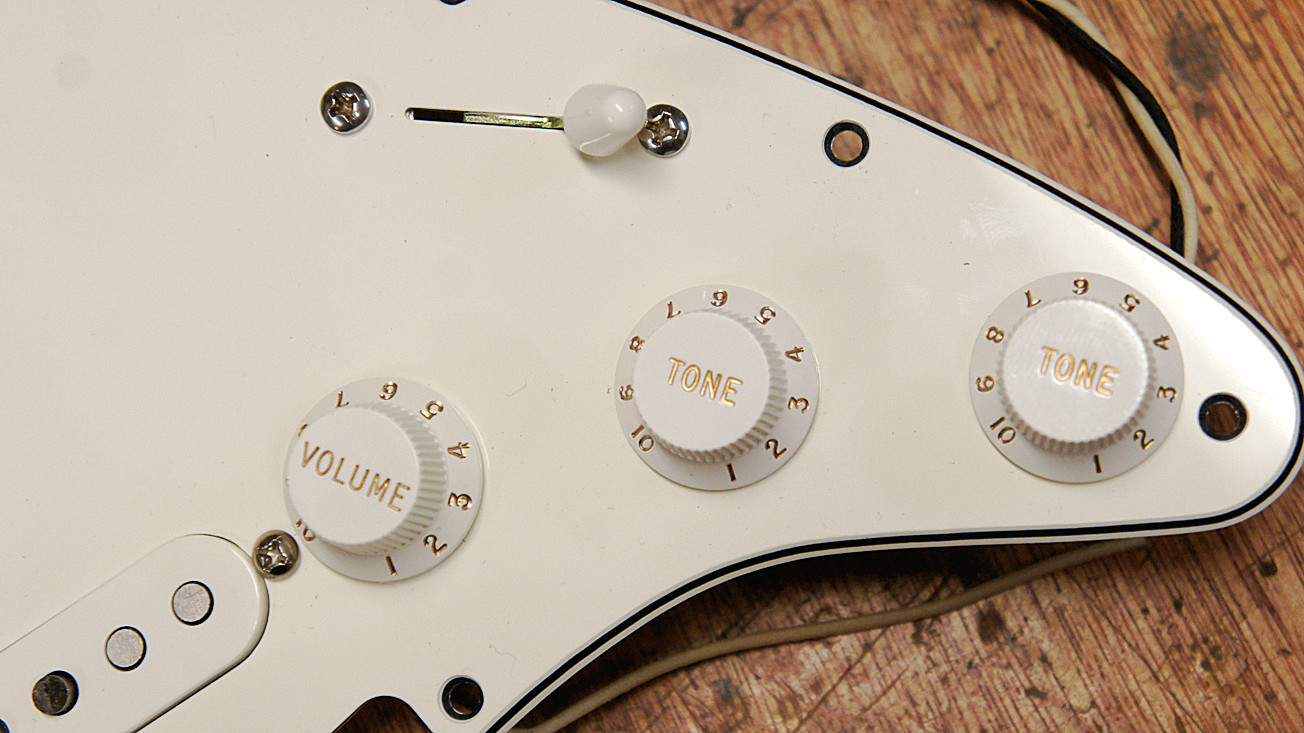
Fit the pickup selector through the slot in the pickguard, and tighten it upwardly. The knobs and the switch tip just push on. These are small details, but this is the 'official' Fender knob alignment! Twist the metal pot shaft all the mode to 10, then line upward the ten on the book knob with the pickup screw. Phone call us fussy...
Step v
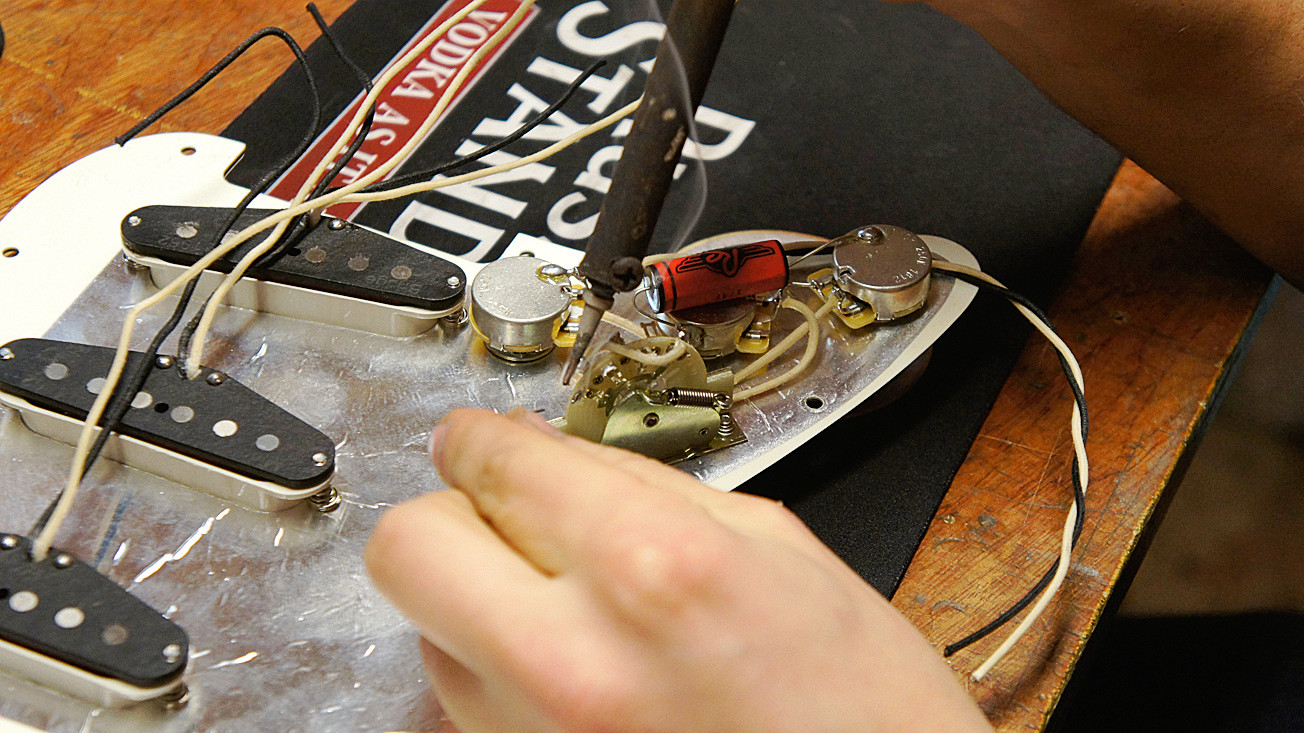
Flip the 'guard over to consummate the circuit. There are half dozen pickup wires that need sending dwelling, but this is an easy job with a wiring diagram. Go the soldering fe on and let it warm up fully (conveniently the time it takes to brew up). Each cablevision is trimmed to length, wire exposed so tinned, forth with the receiving solder lug.
Step 6
With everything in place, it's time to solder. Join up the 3 white wires to the pickup selector lugs. There should be a medium hulk of solder on the volume pot, set up to receive the black ground wires. Twist those three together, and solder them on with plenty of heat.
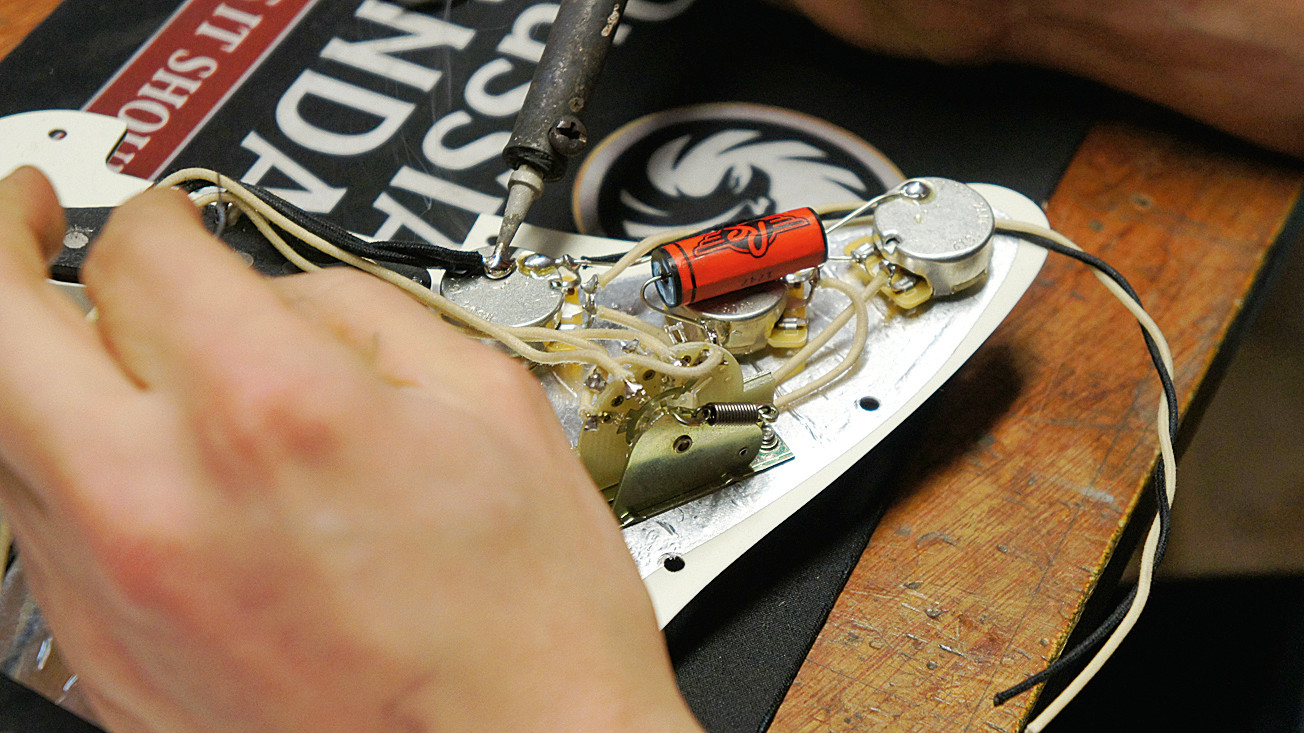
Footstep vii
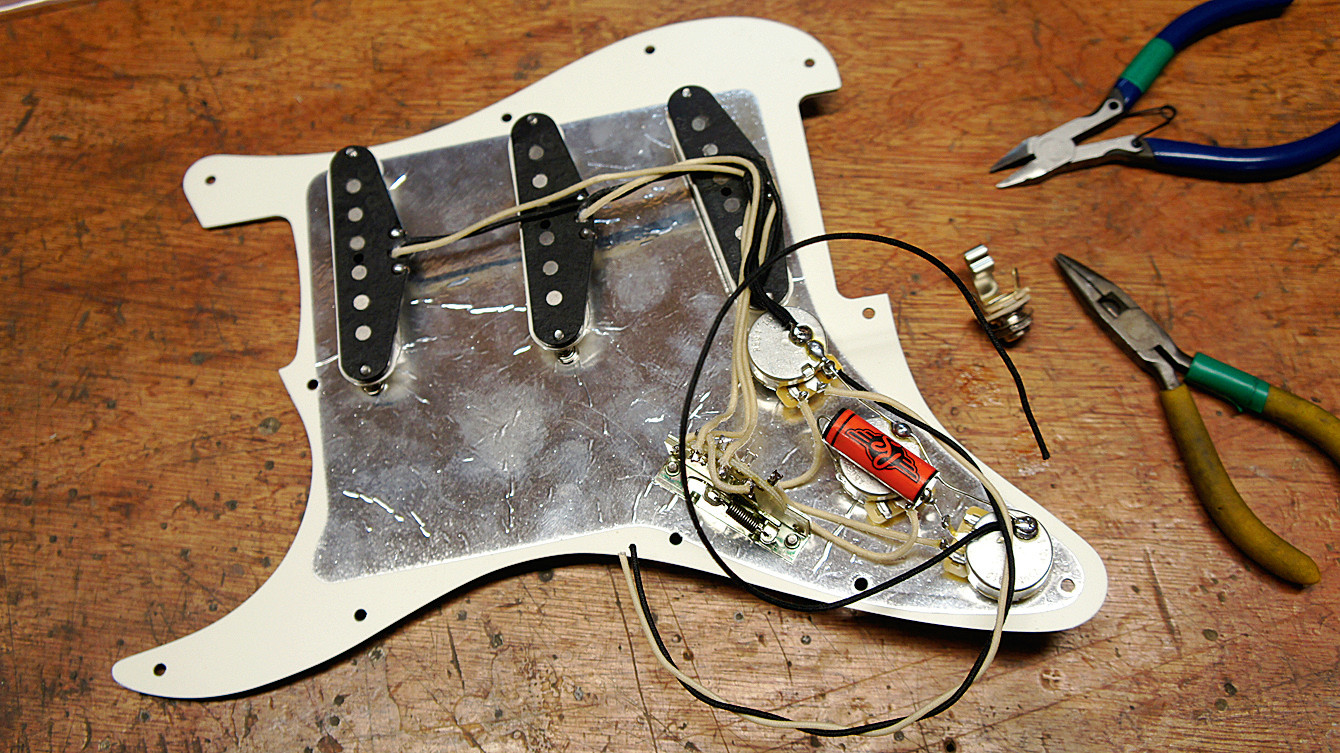
Tidy up your cables. We're doing our best, and then it may every bit well look the function likewise. Can yous come across the three wires hanging off? They're the hot and ground going to the jack socket, and one more than black wire that'south just been attached. That's the tremolo claw wire or 'string ground'. We'll solder those on in a moment.
Footstep 8
Now nosotros've got our lovely new guard ready to go, let's strip down the old one. Loosen off all the parts from the old pickguard and stash all the small screws. Make certain they do not observe a way to become stuck to a pickup, every bit they will break it given half a chance.
Pace ix

With these delightful old guts on show, in that location are only 3 wires belongings it in identify - and those are exactly the three wires that nosotros demand to solder when our new ones go in. Remove the jack socket plate and chop the ii jack wire; chop the tremolo hook wire as well.
Step 10
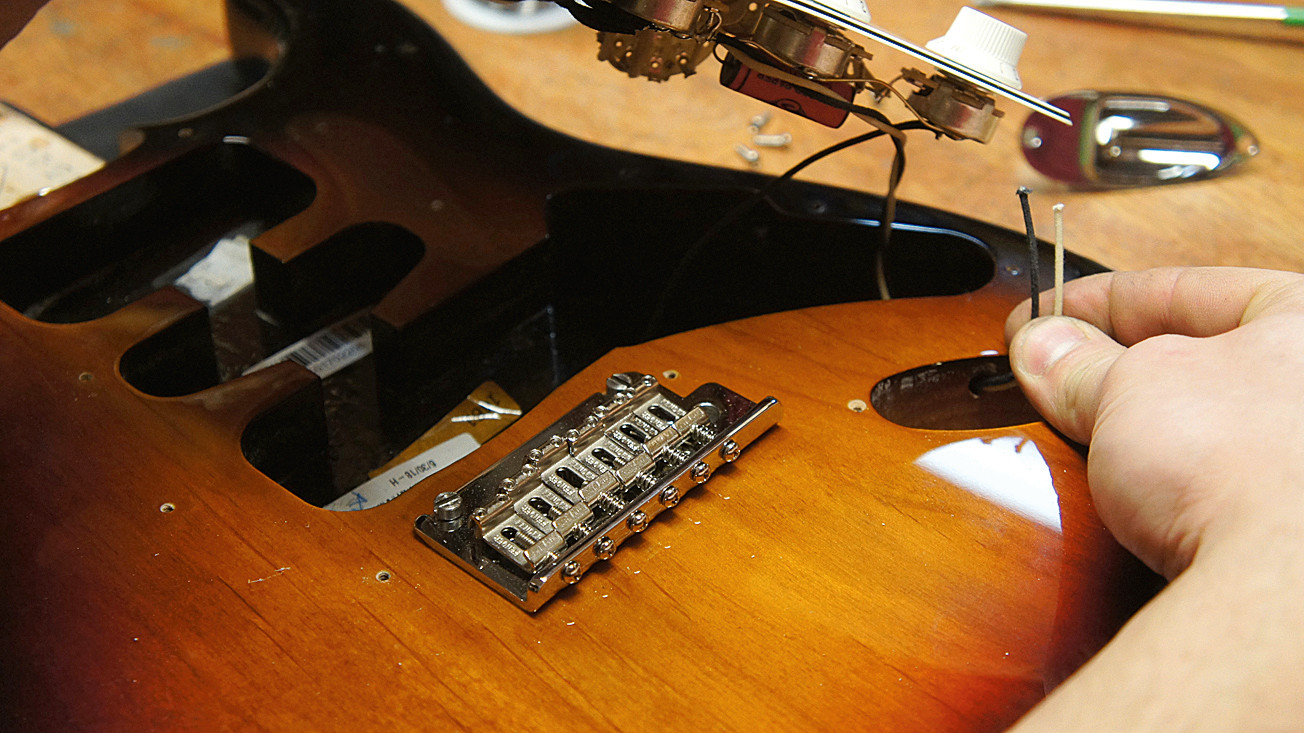
Now information technology'southward time to introduce the new guard to the body. Post the jack wires hot and ground through the small opening, sending them to the jack socket rout. The tremolo claw wire needs to be sent through too; this pigsty is usually harder to find, but it is in that location!
Step 11
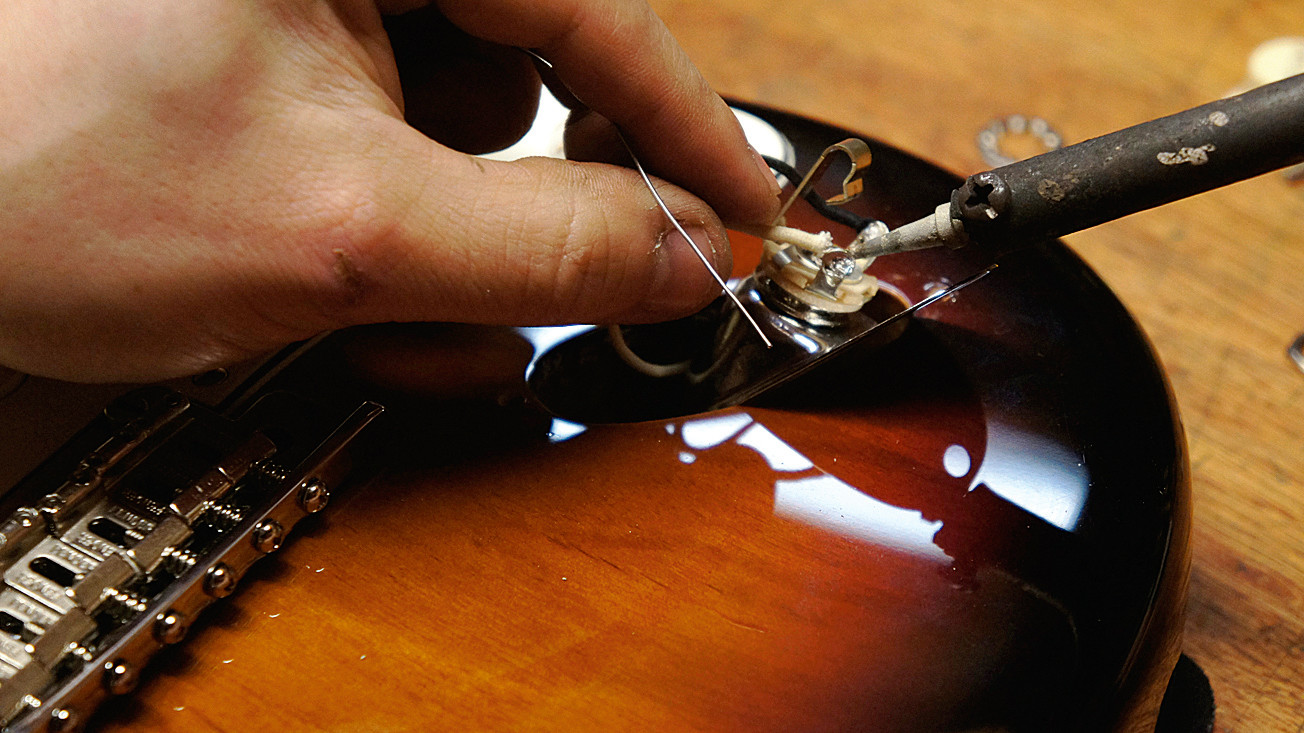
We're using the brand-new Switchcraft jack socket, so that's been tinned and is now getting the two wires soldered on. By the way, this is the correct way to orient the jack socket component - long leg downward. This gives the sprung leg on the jack socket enough room to click in correctly.
Footstep 12
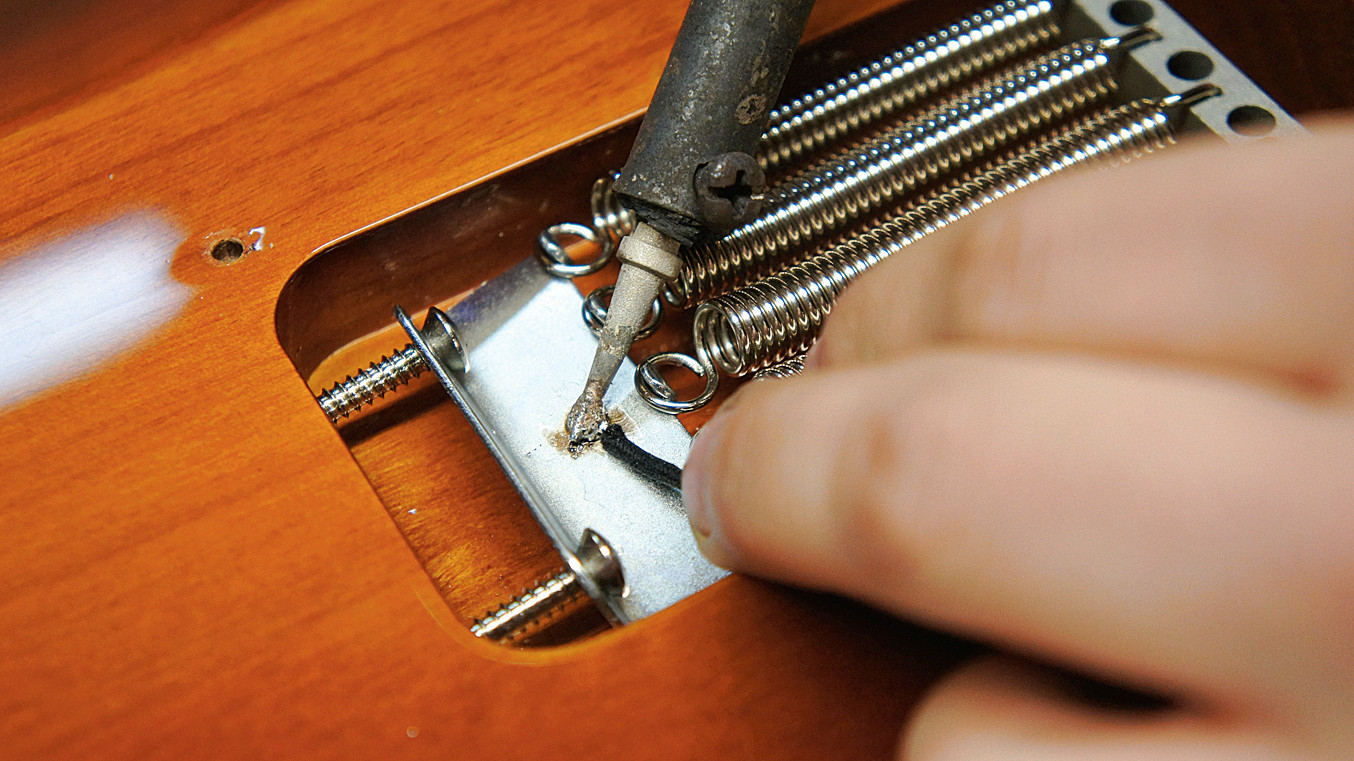
Due to its size, the tremolo hook saps the estrus from your fe, making it difficult to get a good solder joint. An fourscore-watt soldering iron excels hither, but 40 watts will just accept longer to achieve temperature. Get a decent pool of solder on there to exist certain. We're done! Spiral on the 'guard and curiosity at your handiwork.

Source: https://www.musicradar.com/how-to/fix-your-guitar-how-to-replace-stratocaster-pickups
Posted by: strangeasself.blogspot.com
0 Response to "How To Install Pickups On Stratocaster"
Post a Comment